Profile & Multi-Factor Authentication (MFA)
Overview
The Profile section allows administrators to manage their account settings and enable Multi-Factor Authentication (MFA) for enhanced login security. MFA adds an extra layer of protection by requiring a one-time password (OTP) from an authenticator app in addition to the regular password.
Step 1 — Accessing the Profile Menu
To access your profile and MFA settings, click the menu icon (three lines) at the top-right corner of any page. A dropdown menu appears with two options.
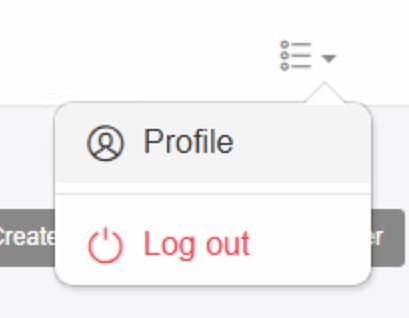
Figure 22 — Profile dropdown menu
| Element | Description |
|---|---|
| Profile | Click to open your Profile page where you can manage account settings and MFA configuration. |
| Log out | Click to log out of the G-Immute system and return to the login page. |
Step 2 — Change Profile Details
After clicking Profile from the dropdown, the Profile page opens. The first section is Change Profile, where you can update your administrator account name.
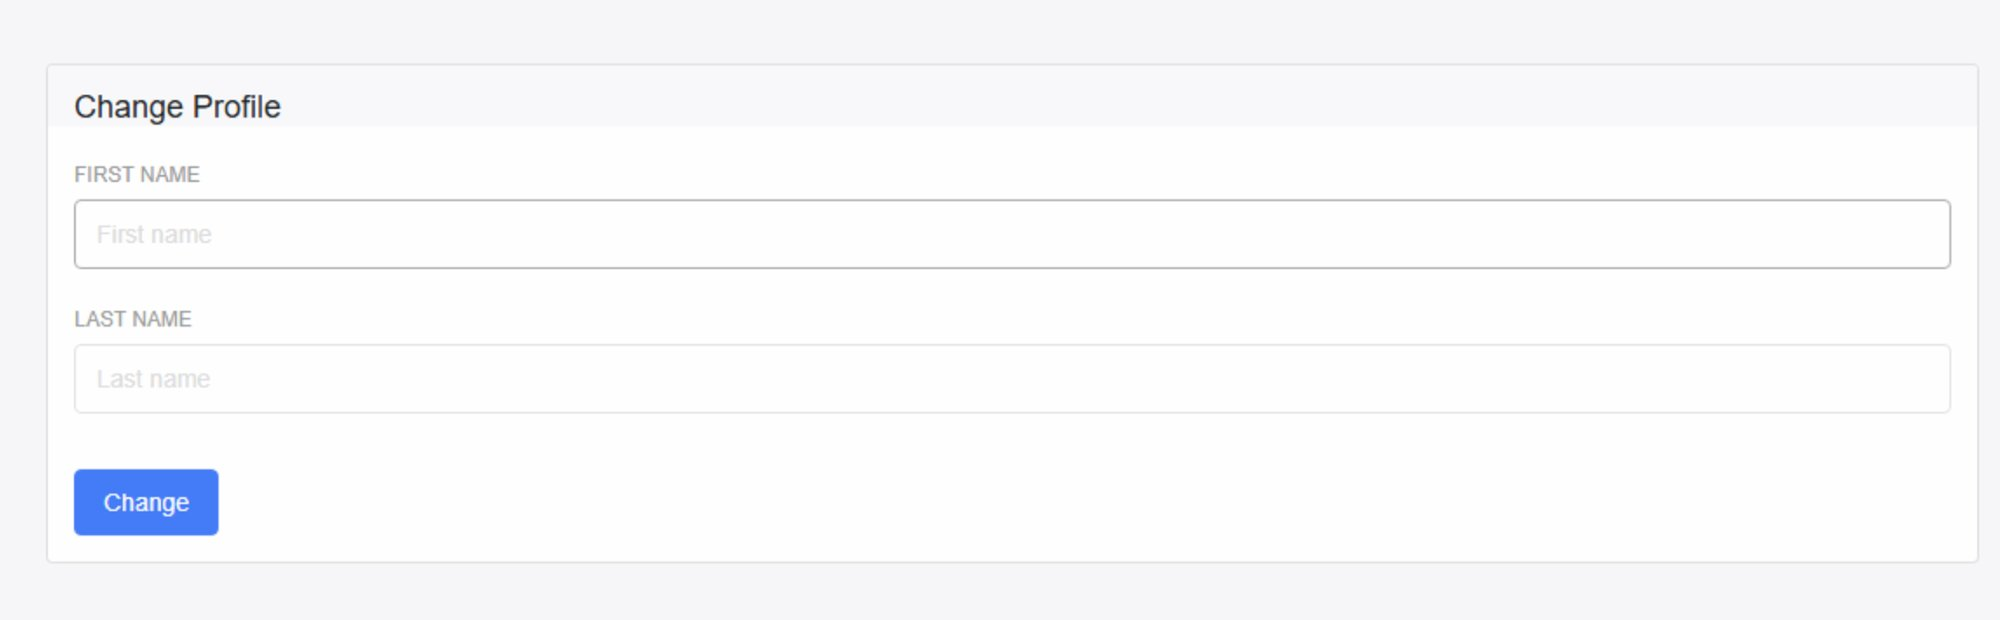
Figure 23 — Change Profile form
| Element | Description |
|---|---|
| FIRST NAME | Enter your first name in this field. Leave blank to keep the existing value. |
| LAST NAME | Enter your last name in this field. Leave blank to keep the existing value. |
| Change button | Click the blue Change button to save and update your profile name details. |
Step 3 — Activating MFA
On the Profile page, scroll to the MFA Settings section and click Activate MFA. A QR code is displayed — scan it using Google Authenticator or any compatible authenticator app, then enter the generated OTP code and click Verify & Enable.
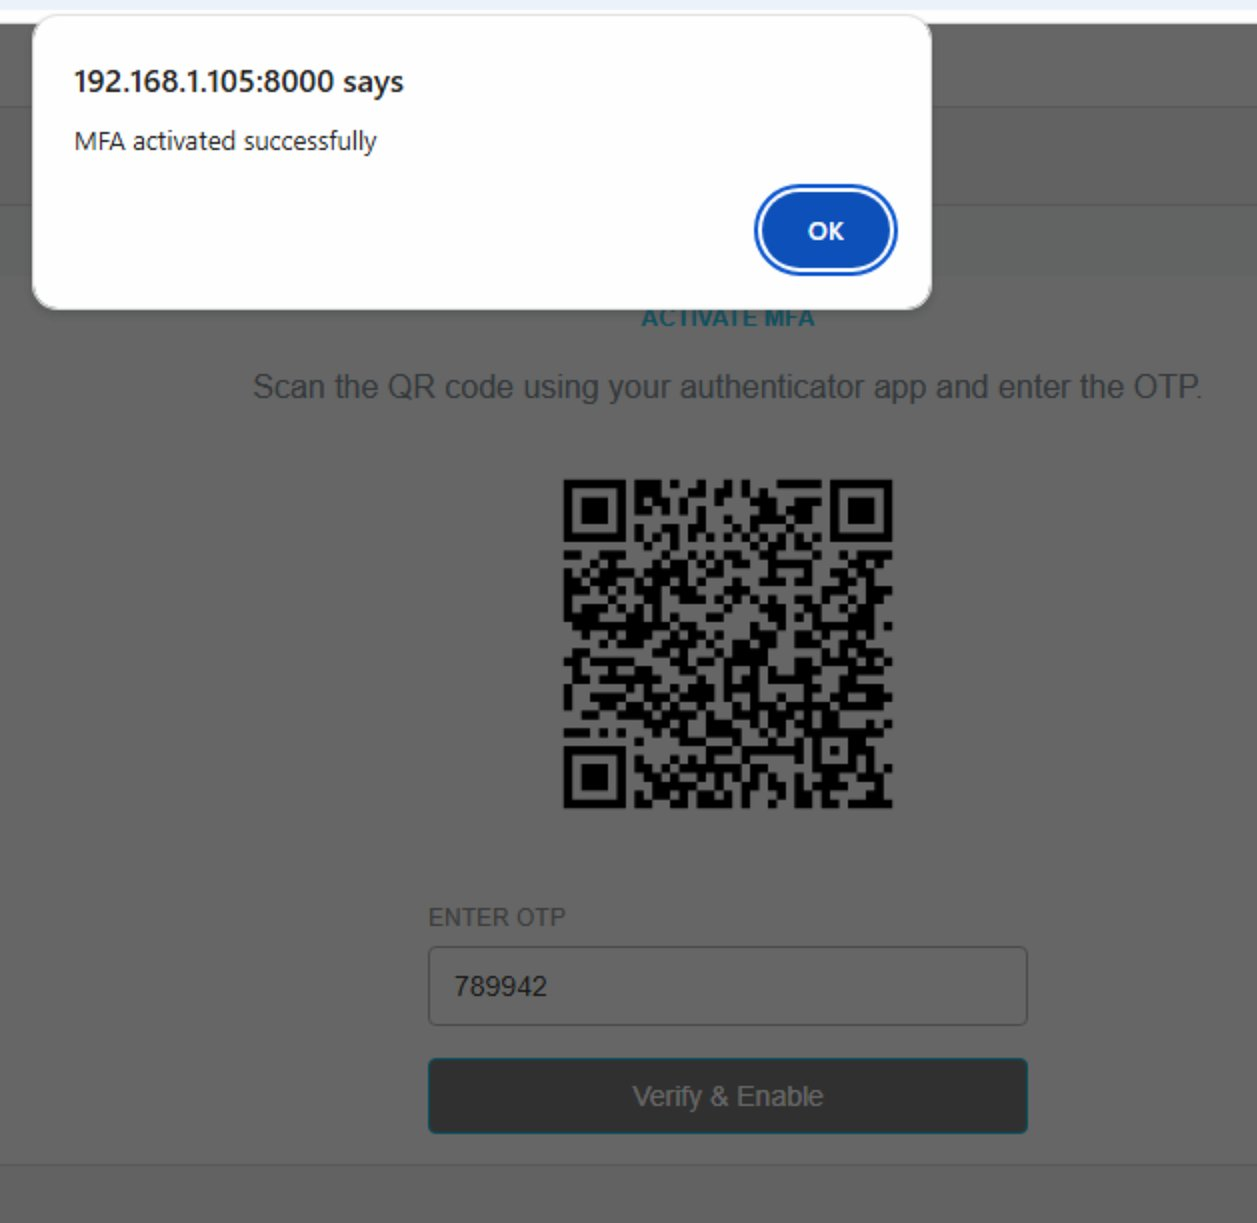
Figure 24 — MFA activation — QR code scan and OTP entry
| Element | Description |
|---|---|
| ACTIVATE MFA | The section on the Profile page used to set up Multi-Factor Authentication. |
| QR Code | Scan this QR code using Google Authenticator, Microsoft Authenticator, or any TOTP-compatible app on your mobile device. |
| ENTER OTP field | Enter the 6-digit one-time password generated by your authenticator app after scanning the QR code. Example: 789942 |
| Verify & Enable button | Click to verify the OTP and activate MFA on your account. |
| MFA activated successfully | A confirmation popup appears confirming MFA has been enabled on your account. |
| OK button | Click OK to dismiss the confirmation and return to the Profile page. |
Use Google Authenticator or Microsoft Authenticator on your mobile device to scan the QR code. A new OTP is generated every 30 seconds — enter it before it expires.
Step 4 — MFA Enabled State
After MFA is successfully activated, the MFA Settings section updates to confirm MFA is currently enabled. A Disable MFA button is now available if you wish to turn it off.

Figure 25 — MFA Settings showing MFA is currently enabled
| Element | Description |
|---|---|
| MFA Settings | The settings panel on the Profile page showing the current MFA status. |
| MFA is currently enabled | Shown in green — confirms that MFA is active and will be required at every login. |
| Disable MFA button (Red) | Click to disable MFA on your account. A confirmation dialog will appear before MFA is turned off. |
Disabling MFA — Confirmation Dialog
When the Disable MFA button is clicked, a confirmation dialog appears warning that disabling MFA will reduce account security. You must confirm before MFA is disabled.
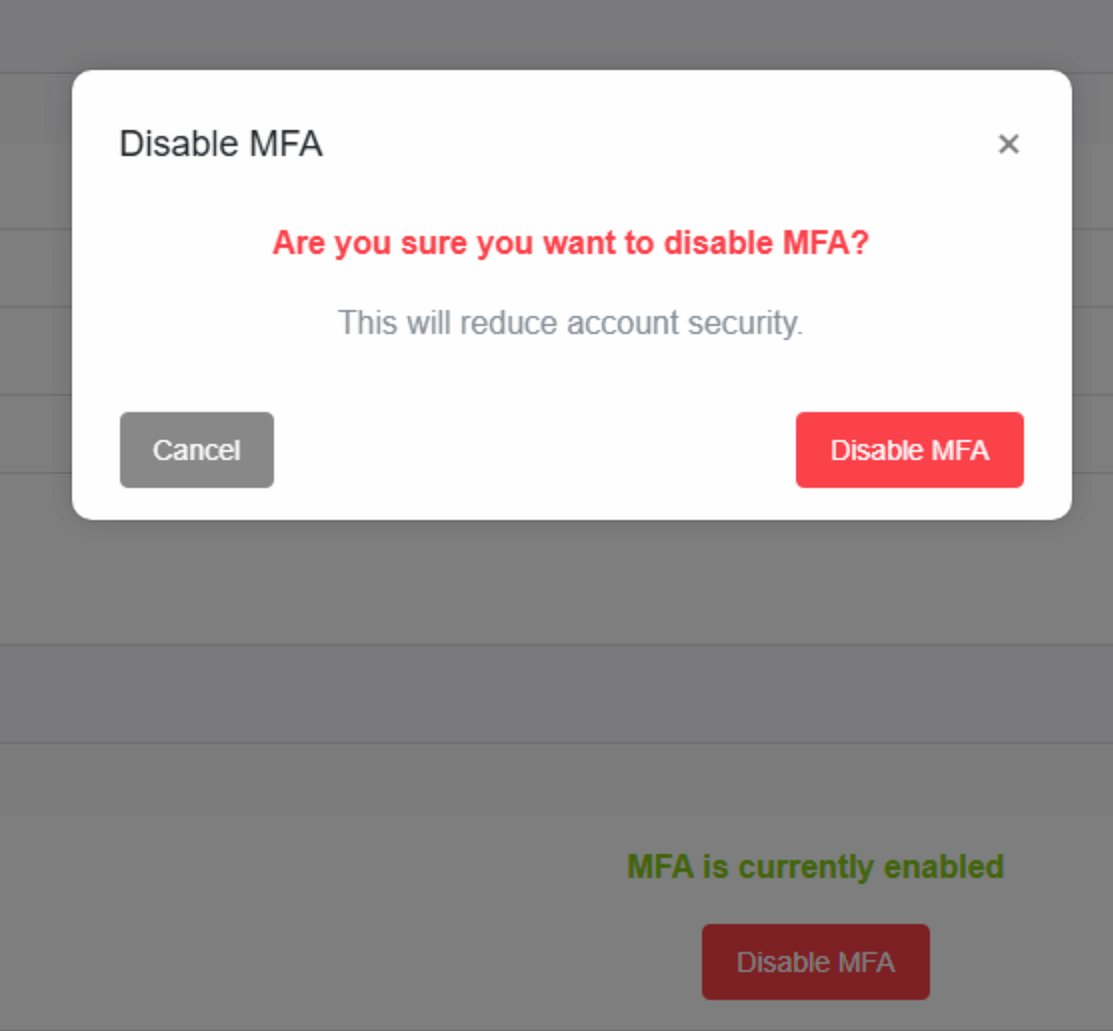
Figure 26 — Disable MFA confirmation dialog
| Element | Description |
|---|---|
| Disable MFA dialog | A confirmation popup that appears when the Disable MFA button is clicked. |
| Warning message | "Are you sure you want to disable MFA?" — shown in red to highlight the security impact. |
| Security notice | "This will reduce account security." — reminds the administrator that removing MFA makes the account less secure. |
| Cancel button (Grey) | Click to close the dialog without making any changes. MFA remains enabled. |
| Disable MFA button (Red) | Click to confirm and permanently disable MFA on your account. |
It is strongly recommended to keep MFA enabled at all times. Disabling MFA removes the extra layer of login security and makes the account more vulnerable to unauthorized access.